For using CFturbo with a node-locked license 2 steps must be performed:
1)Request a license file using the CFturbo license window (SETTINGS | Licensing | REQUEST new node-locked license by e-mail)
2)Copy the node-locked license file in the CFturbo installation directory (C:\Program Files\CFturbo *) that was selected during setup
Note: If CFturbo is additionally configured for using a floating license, CFturbo modules get checked out from this floating license first if available.
Requesting a node-locked license
If neither a node-locked license file is present nor a floating license is configured, CFturbo will open the licensing window automatically (SETTINGS | Licensing).
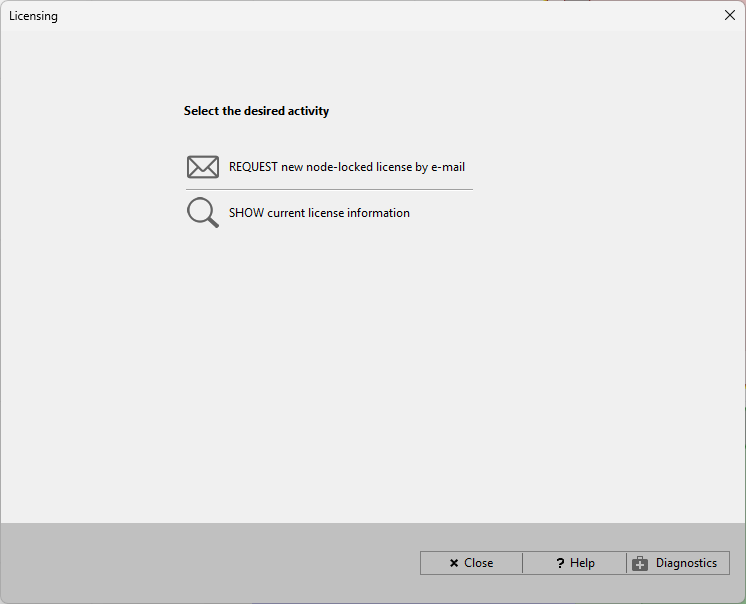
Here one can select REQUEST new node-locked license by e-mail.
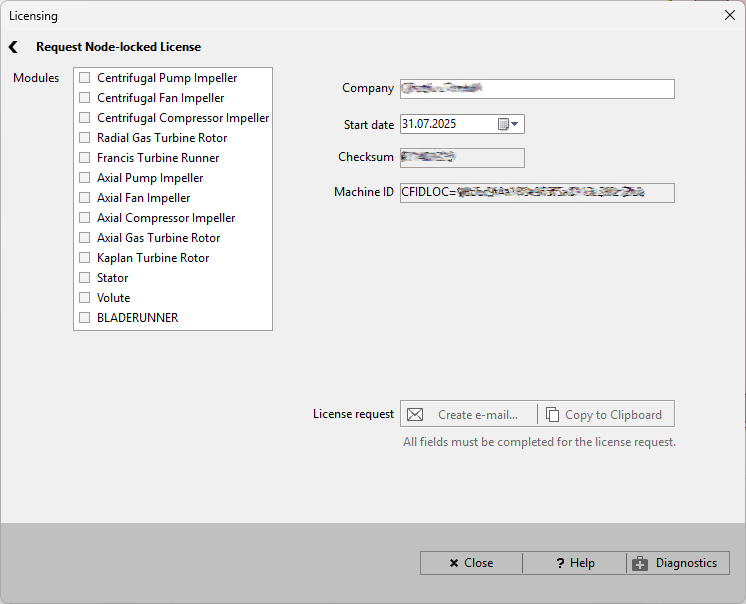
Under Modules the CFturbo modules must get selected. Insert the company/ institution/ college name under Company.
The intended Start date can be selected, for example to sync a short time-period license to a project's start date.
The Machine ID and the Checksum are calculated automatically. They ensure the singular usage of provided license information and link the license to the local computer.
Once the required information have been entered, one can
•use the Create e-mail button to prepare a message with the computer's default e-mail client (the mail will NOT be sent automatically!)
OR
•use the Copy to Clipboard button if the manual creation of the mail is intended and paste the information (send the e-mail to sales@cfturbo.com).
Install license file
Copy the received CFturbo license file to the CFturbo installation directory (C:\Program Files\CFturbo *) that was selected during setup.
The CFturbo license file will have a .lic file extension, which must not be modified!
There should be only one license file (*.lic) placed within the CFturbo installation directory.
Once this step is complete, one may restart CFturbo and check the license information (SETTINGS | Licensing | SHOW current license information).