11.4.3 Simulation
This section explains the settings to run the heated disk simulation
Creating Monitoring Points
The steps are as follows:
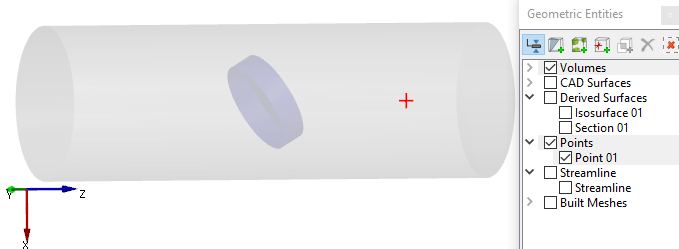
- On the Geometric Entities Panel toolbar click Create a Monitoring Point
 icon, to create Points Point 01.
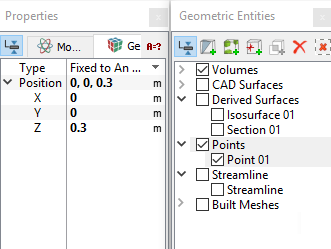
 - Enter 0, 0, 0.3 m for Position in the Geometry Tab of Properties Panel (see Figure 11.87).
|
Note: Monitoring points need to be created before running the simulation for recording data (see ,Figure 11.88.). The position of a Points may also be dragged to a new location using the Select |
Simulation Settings
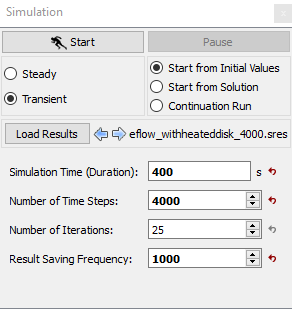
- Select Simulation Panel and enable Transient.
- Enter Number of Iterations as 25 and Result Saving Frequency as 1000 .
- Enter Simulation Time (Duration) as 400s and Number of Time Steps as 4000 (see, Figure 11.89).
- After you save the project, click Start to run the simulation.
- The result files are saved as .sres in the working folder (Example : "heateddisk_1000.sres"). This file is overwritten depending on the Result Saving Frequency.
| Note: The Result Saving Frequency option in the Simulation Panel is set to a small value (say 5 or 10) before running the simulation to obtain better animations. |
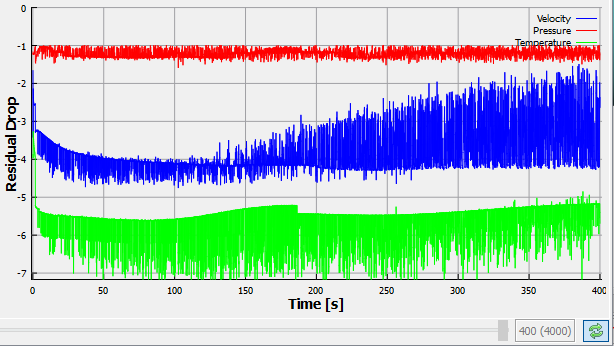
| Note: The default Converge Criterion is 0.1 for Transient Simulations. When the residuals for all the variables drop by one order or the maximum Number of Iterations is reached, the calculation proceeds to the next time-step. |